Adding CKEditor in Blazor with image upload
A simple tutorial on how CKEditor5 can be used in the Blazor server application with image upload
within the server. There’s nothing special about CKEditor5 in Blazor, you just have to know how Blazor javascript interop works as this will give you the ability to use any javascript libraries to work with including CKEditor5. You don't find any explanation how Blazor's javascript interop works here, as I'm only focusing on adding editor in the page with basic functionality.
Get CKEditor5
If you already have CKEditor5 in your project, you should check if “Image” and “Image upload” adapters are added to your CKEditor5. If not, add them because they are required in order for you to be able to work with image view and image upload.
If you don’t have CKEditor5 or you want to update it, you can use CKEditor5 builder provided in the
official site - https://ckeditor.com/ckeditor-5/online-builder/
Builder will ask to select the editor type (classic editor is used for this tutorial)
After selecting the editor type you will see a plugin selection window. This is the place where editor
functionality needs to be selected, by default it gives everything you need for this tutorial, but you can
add or remove functionality if you need to (Image and Image upload should be included).
 |
| Plugins selected for this tutorial |
Select plugins you require and finish all other steps builder will ask for. In the end builder will generate link to download CKEditor5.
Extract the zip file and go to build folder. In that folder you will find "ckeditor.js" file. This file should be added to your project (step 2).
Add "ckeditor.js" to your Blazor project
This is the time to create new .NET 5 Blazor server application, if you don’t already have one
created.
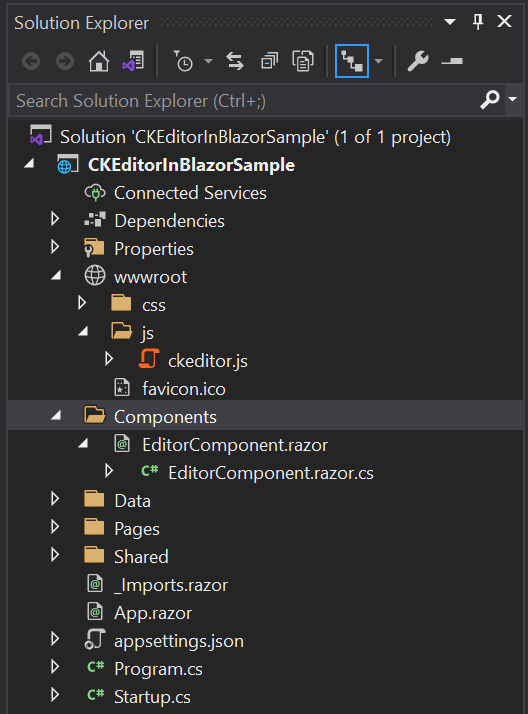
In your solution explorer go to wwwroot and create folder for your javascript files, name it “js” and paste ckeditor.js (described in step 1) file to this folder or if you are using existing project with different folder name for javascript files use your own folder instead.
 |
| Your solution should look similar to this. (I’m using VS 2019) |
After “ckeditor.js” is added, open “_Host.cshtml” file which is located in “Pages” folder. In the end
before the “body” add a new script link to “ckeditor.js”. Link to “ckeditor.js” should be added above
the “_framework/blazor.server.js” link.
 |
| _Host.cshtml with link to ckeditor.js |
Create razor component for CKEditor5
All CKEditor5 functionality will be added to a single razor component, this will add flexibility to add
multiple editors in any place without the need of an additional code/work.
Create a new folder in your solution explorer and name it “Components”. In this folder create new
razor component “EditorComponent.razor”. In order to separate the template code from C# code,
create a new cs file called “EditorComponent.razor.cs” in the same folder.
EditorComponent.razor file content
1 2 3 4 5 | <div style="width:@EditorWidth"> <div id="@EditorId"></div> </div> |
Where you see the two div elements, the outer div element’s purpose is to set the editor width and the inner div will be replaced with CKEditor5.
EditorComponent.razor.cs file content
1 2 3 4 5 6 7 8 9 10 11 12 13 14 15 16 17 18 19 20 21 22 23 24 25 26 27 28 29 30 31 32 33 34 35 36 37 38 39 40 41 42 43 44 45 46 47 48 49 50 | using Microsoft.AspNetCore.Components; using Microsoft.JSInterop; using System; using System.Threading.Tasks; namespace CKEditorInBlazorSample.Components { partial class EditorComponent : IDisposable { [Inject] public IJSRuntime JSRuntime { get; set; } [Parameter] public string EditorValue { get; set; } [Parameter] public EventCallback<string> EditorValueChanged { get; set; } [Parameter] public string EditorHeight { get; set; } [Parameter] public string EditorWidth { get; set; } string _editorId; public string EditorId { get { if (string.IsNullOrEmpty(_editorId)) _editorId = $"ckeditor_{Guid.NewGuid().ToString().ToLower().Replace("-", "")}"; return _editorId; } set => _editorId = value; } protected override async Task OnAfterRenderAsync(bool firstRender) { if (firstRender) await JSRuntime.InvokeVoidAsync("CreateEditor", EditorId, EditorValue, EditorHeight, DotNetObjectReference.Create(this)); await base.OnAfterRenderAsync(firstRender); } [JSInvokable] public async Task OnEditorChanged(string data) { await EditorValueChanged.InvokeAsync(data); } public void Dispose() { JSRuntime.InvokeVoidAsync("DestroyEditor", EditorId); } } } |
From the code above you will notice that this component includes 3 properties – EditorHeight,
EditorWidth, EditorValue. All these properties will be used when initializing CKEditor5. To make an
EditorValue two-way binding “EditorValueChanged” event callback was implemented.
“OnAfterRenderAsync” event is used to execute javascript function which will create CKEditor5.
“OnEditorChanged” event will be called from javascript by CKEditor5 when it’s content is changed (user edits something).
And last but also a very important point is the IDisposable interface implementation. After component is removed from the application it will implement a “Dispose” method which will destroy CKEditor5 which is related to this component.
To be able use this new component globally you should add a using statement to “_Imports.razor” file (image below).
If you selected different project name, your default namespace will be different from the image below.

We have CKEditor5 scripts and razor component to work with it, but if you try to use this component you will get errors, as we only have 2 out of the 3 key elements.
Functionality to create, store and destroy CKEditor5
Create new javascript file in js folder and name it “editor.js”. Copy all the codes from below. This
javascript file will be responsible for CKEditor5 creation and destruction.
editor.js file content
1 2 3 4 5 6 7 8 9 10 11 12 13 14 15 16 17 18 19 20 21 22 23 24 25 26 27 28 29 30 31 32 33 34 35 36 37 38 39 40 41 42 43 44 45 46 47 48 49 50 51 52 53 54 55 56 57 58 59 60 61 62 63 64 65 66 67 68 69 70 71 72 73 74 75 76 77 78 79 80 81 82 83 84 85 86 87 88 89 90 91 92 93 94 95 96 97 98 99 100 101 102 103 104 105 106 107 | editors = {}; function CreateEditor(editorId, defaultValue, height, dotNetReference) { ClassicEditor .create(document.getElementById(editorId), { toolbar: { items: [ 'heading', '|', 'bold', 'italic', 'link', 'bulletedList', 'numberedList', '|', 'outdent', 'indent', '|', 'imageUpload', 'blockQuote', 'insertTable', 'mediaEmbed', 'undo', 'redo' ] }, language: 'en', licenseKey: '', }) .then(editor => { editors[editorId] = editor; editor.setData(defaultValue); editor.editing.view.change(writer => { writer.setStyle('height', height, editor.editing.view.document.getRoot()); }); editor.model.document.on('change:data', () => { let data = editor.getData(); dotNetReference.invokeMethodAsync('OnEditorChanged', data); }); }) .catch(error => { console.error(error); }); } function DestroyEditor(editorId) { editors[editorId].destroy().then(() => delete editors[editorId]) .catch(error => console.log(error)); } |
Using javascript interop, editor component will execute “CreateEditor” function with all required parameters. After CKEditor5 is created, it will be added to the array of “editors”.
A newly created editor will have "on change" event, which will invoke “OnEditorChanged” function inside the editor component ("EditorComponent.razor.cs").
There is also an added “DestroyEditor” function which is executed by editor component when editor component is disposed.
Don’t forget to register “editor.js” scripts to “_Host.cshtml”. This script should be added after the “ckeditor.js”.
 |
| _Host.cshtml after registering editor.js |
Check is everything is working
Before going to the section where image upload will be implemented, we need to test the application
first, to make sure that the basic functionality is working.
Add the editor component to the “Index.razor” page. You can copy the code used as an example from below, to test and ensure that CKEditor5 is working correctly.
1 2 3 4 5 6 7 8 9 10 11 12 13 14 15 | @page "/" <h1>Hello, world!</h1> Welcome CKEditor5 in Blazor. <br /> <i>@editorValue</i> <EditorComponent EditorHeight="200px" EditorWidth="600px" @bind-EditorValue="@editorValue"></EditorComponent> @code { string editorValue { get; set; } = "I hope you see me :)"; } |
If you add this code to your Index.razor page and launch the application, you should see a page as in the image below. If CKEditor5 is visible in the page try to update the text in the editor, updating the text should also update “editorVlaue” property (due to two-way binding) which can be used to get content from the editor. To be sure what “editorValue” is updated I have added “i” tag above the editor so if the “editorValue” is changed, the content inside “i” will also will be changed.
 |
| Example how should look CKEditor5 if everything is working |
Create Web API for file upload to server
The purpose of this web api is to allow for CKEditor5 to upload images to the server and load images to the editor from the server.
Let's start by creating new .Net 5 Web API project (ASP.NET core Web API) with the name "CKEditorInBlazorSample.WebApi".
The next step is to create a controller to work with image requests, to do so create a new controller
and name it "ImageController".
 |
| Solution explorer after adding ImageController |
Copy the code from below to your image controller.
"ImageController.cs file content"
1 2 3 4 5 6 7 8 9 10 11 12 13 14 15 16 17 18 19 20 21 22 23 24 25 26 27 28 29 30 31 32 33 34 35 36 37 38 39 40 41 42 43 44 45 46 47 48 49 50 51 52 53 54 55 56 | using Microsoft.AspNetCore.Mvc; using System; using System.IO; using System.Threading.Tasks; namespace CKEditorInBlazorSample.WebApi.Controllers { [Route("api/Images")] [ApiController] public class ImageController : ControllerBase { [HttpPost, DisableRequestSizeLimit] public IActionResult Upload() { try { var file = Request.Form.Files[0]; if (file.Length > 0) { var fileName = $"{Guid.NewGuid()}_{file.FileName}"; using var stream = new FileStream(Path.Combine(Directory.GetCurrentDirectory(), "Images", fileName), FileMode.Create); file.CopyTo(stream); return Ok(new { url = $"https://localhost:44342/api/Images/{fileName}" }); } else { return BadRequest("File data not found"); } } catch (Exception ex) { return BadRequest(ex.Message); } } [HttpGet("{fileName}")] public async Task<IActionResult> LoadFile(string fileName) { var path = Path.Combine(Directory.GetCurrentDirectory(), "Images", fileName); var memory = new MemoryStream(); using (var stream = new FileStream(path, FileMode.Open)) { await stream.CopyToAsync(memory); } memory.Position = 0; return File(memory, @"application/octet-stream", Path.GetFileName(path)); } } } |
This code has two methods "Upload" and "LoadFile". The first method is responsible for getting images from the request, give it a unique name and save it to "Images" folder and return the link for image load. "LoadFile" method is used to load images from the server by providing the file name.
Create new folder "Images", this folder will be used to store all the images.
(Important!!!)After the image is uploaded, json will be returned with property "url", your url will most likely be different than mine, so update it or your CKEditor5 will not be able to load images from the server (CKEditor5 will use this link to load image).
Next step is to deal with CORS!!!
In your Web API project go to "Startup.cs" file and make modifications to it to allow cross domain
requests. This is required, because Blazor and Web Api work on different domains (ports).
To enable requests from Blazor (with CKEditor5) make adjustments to your "Startup.cs" (in web api) file as seen in the code below (code in orange background was added, some codes have been removed to make it easier to see).
Startup.cs
1 2 3 4 5 6 7 8 9 10 11 12 13 14 15 16 17 18 19 20 21 22 23 24 25 26 27 28 29 30 31 32 33 34 35 36 37 38 39 40 41 42 43 44 45 46 47 | namespace CKEditorInBlazorSample.WebApi { public class Startup { public Startup(IConfiguration configuration) { Configuration = configuration; } public IConfiguration Configuration { get; } readonly string MyAllowSpecificOrigins = "_development"; // This method gets called by the runtime. Use this method to add services to the container. public void ConfigureServices(IServiceCollection services) { services.AddCors(options => { options.AddPolicy(name: MyAllowSpecificOrigins, builder => { builder.WithOrigins("https://localhost:44331", "http://localhost:44331"); builder.AllowAnyMethod(); builder.AllowAnyHeader(); }); }); services.AddControllers(); ... } // This method gets called by the runtime. Use this method to configure the HTTP request pipeline. public void Configure(IApplicationBuilder app, IWebHostEnvironment env) { ... app.UseRouting(); app.UseCors(MyAllowSpecificOrigins); app.UseAuthorization(); ... } } } |
This code changes server settings to accept cross origin requests from the domain which is added to the exceptions list (line 22). And again, your configuration probably will be different than mine, because of different ports that are used for your application. To know which domain to add to the exception, launch your Blazor app where CKEditor5 is added and copy the address (domain) to the exceptions list.
Create custom upload adapter
Final step is to create a custom upload adapter to be responsible for image upload from CKEditor5 to the server. How to create the custom upload adapter is described in the official site of CKEditor5, you can see more details about it in this link, but in order to make this tutorial complete I have added an adapter code which is provided in the oficial site with all required modifications.
Create a new javascript file (in your blazor application with CKEditor5) and call it "ckeditorUploadAdapter.js". Copy all the codes from the below and paste it to your file.
1 2 3 4 5 6 7 8 9 10 11 12 13 14 15 16 17 18 19 20 21 22 23 24 25 26 27 28 29 30 31 32 33 34 35 36 37 38 39 40 41 42 43 44 45 46 47 48 49 50 51 52 53 54 55 56 57 58 59 60 61 62 63 64 65 66 67 68 69 70 71 72 73 74 75 76 77 78 79 80 81 82 83 84 85 86 87 88 89 90 91 92 93 94 | class UploadAdapter { constructor(loader) { // The file loader instance to use during the upload. this.loader = loader; } // Starts the upload process. upload() { return this.loader.file .then(file => new Promise((resolve, reject) => { this._initRequest(); this._initListeners(resolve, reject, file); this._sendRequest(file); })); } // Aborts the upload process. abort() { if (this.xhr) { this.xhr.abort(); } } // Initializes the XMLHttpRequest object using the URL passed to the constructor. _initRequest() { const xhr = this.xhr = new XMLHttpRequest(); // Note that your request may look different. It is up to you and your editor // integration to choose the right communication channel. This example uses // a POST request with JSON as a data structure but your configuration // could be different. xhr.open('POST', 'https://localhost:44342/api/Images', true); xhr.responseType = 'json'; } // Initializes XMLHttpRequest listeners. _initListeners(resolve, reject, file) { const xhr = this.xhr; const loader = this.loader; const genericErrorText = `Couldn't upload file: ${file.name}.`; xhr.addEventListener('error', () => reject(genericErrorText)); xhr.addEventListener('abort', () => reject()); xhr.addEventListener('load', () => { const response = xhr.response; // This example assumes the XHR server's "response" object will come with // an "error" which has its own "message" that can be passed to reject() // in the upload promise. // // Your integration may handle upload errors in a different way so make sure // it is done properly. The reject() function must be called when the upload fails. if (!response || response.error) { return reject(response && response.error ? response.error.message : genericErrorText); } // If the upload is successful, resolve the upload promise with an object containing // at least the "default" URL, pointing to the image on the server. // This URL will be used to display the image in the content. Learn more in the // UploadAdapter#upload documentation. resolve({ default: response.url }); }); // Upload progress when it is supported. The file loader has the #uploadTotal and #uploaded // properties which are used e.g. to display the upload progress bar in the editor // user interface. if (xhr.upload) { xhr.upload.addEventListener('progress', evt => { if (evt.lengthComputable) { loader.uploadTotal = evt.total; loader.uploaded = evt.loaded; } }); } } // Prepares the data and sends the request. _sendRequest(file) { // Prepare the form data. const data = new FormData(); data.append('upload', file); // Important note: This is the right place to implement security mechanisms // like authentication and CSRF protection. For instance, you can use // XMLHttpRequest.setRequestHeader() to set the request headers containing // the CSRF token generated earlier by your application. // Send the request. this.xhr.send(data); } } |
Nothing needs to be changed for this code in your application except line 32(marked in orange). This is the link to your image upload web api. Make sure you add it correctly or CKEditor5 will not be able to send an image to your api.
Add link to this script in "_Host.cshtml".
 |
| _Host.cshtml after registering ckeditorUploadAdapter.js |
Now open your "editor.js" file and update the code from the code below. You need to add the code
marked in orange.
Updates to "editor.js" file
1 2 3 4 5 6 7 8 9 10 11 12 13 14 15 16 17 | function CustomUploadAdapterPlugin(editor) { editor.plugins.get('FileRepository').createUploadAdapter = (loader) => { return new UploadAdapter(loader); }; } editors = {}; function CreateEditor(editorId, defaultValue, height, dotNetReference) { ClassicEditor .create(document.getElementById(editorId), { extraPlugins: [CustomUploadAdapterPlugin], toolbar: { items: [ 'heading', ... |
After this updates your Blazor and Web api applications should work correctly. It's easy to make mistakes with CORS or custom plugin adapter, so if something is not working this is the first thing to check.
Summary
While creating this tutorial I tried to make it as useful and simple as possible, but in the end it became much longer than I expected and I hope it did not become too complicated.
If you will be able to implement CKEditor5 to your application it's probably a half way what you have to do in production version, because you need to deal with authentications, make sure what only images is accepted by server, deal with image sizes and e.t.c. but at least (I hope) you get some help you looked for.
If you see any problems or maybe you see how can some code can be improved, let me know in comments it would be nice to improve my knowledge and for everyone else to have better tutorial.
Comments
Post a Comment